Introduction: Capturing the Essence of a Classic Accessory
In the realm of artistic apparel illustration, few items embody casual cool quite like the baseball cap. This iconic headwear, with its curved brim and adjustable strap, has transcended sports fields to become a staple in fashion worldwide. Drawing a realistic baseball cap involves understanding its structure, capturing its textures, and conveying its functional yet fashionable appeal. This comprehensive guide dissects the process into manageable steps, ensuring that your drawing technique hits a home run every time.
Understanding the Anatomy of a Baseball Cap
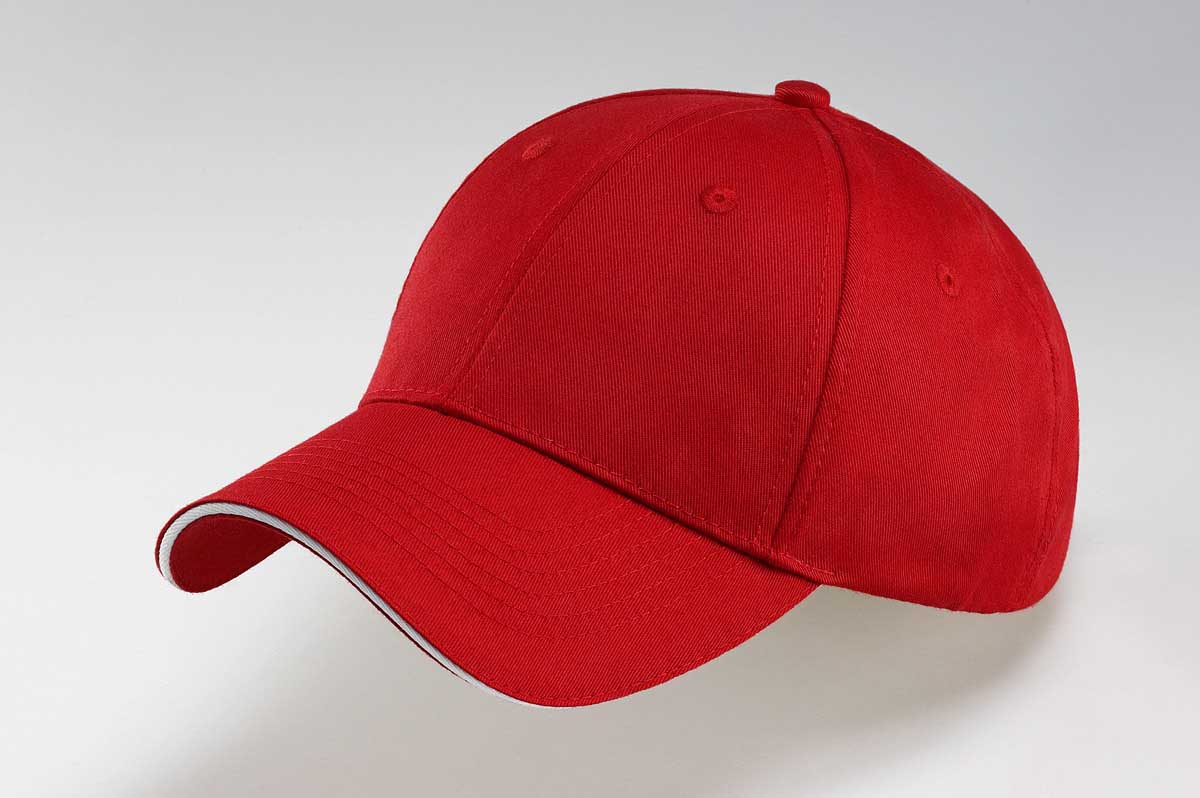
Before putting pencil to paper, familiarize yourself with the key components of a baseball cap. It typically consists of six panels sewn together, forming the crown; a stiffened brim to shield the eyes from sunlight; a button topping the crown; eyelets for ventilation; and an adjustable closure at the back. Recognizing these elements is crucial for creating an accurate representation.

Materials Matters: Gathering Your Art Toolkit
To embark on this drawing journey, assemble your tools wisely. A set of graphite pencils ranging from 2H (hard, for light outlines) to 6B (soft, for shading), an eraser, a blending tool like a tortillon, and a smooth drawing paper are essential. Optionally, colored pencils or markers can add depth and realism to your cap’s details.
Sketching the Foundation: Laying Out the Basic Shapes
Begin by lightly sketching the basic form of the cap using a 2H pencil. Outline the overall silhouette as an oval for the crown and a long rectangle for the brim, ensuring proportions reflect reality. Sketch guidelines to mark the position of each panel seam, the button on top, and the curvature of the brim. Remember, these initial lines should be light and easily erasable, serving as a roadmap for the detailed work to come.
Defining Panels and Structure
With the basic shape in place, refine the outline by sketching the individual panels. Pay attention to how they slightly overlap at the seams, creating depth. Draw the button precisely at the crown’s apex and indicate the ventilation eyelets evenly spaced around it. For added accuracy, reference real caps or photographs to capture the subtle variations between different styles.

Shading Techniques for Textured Realism
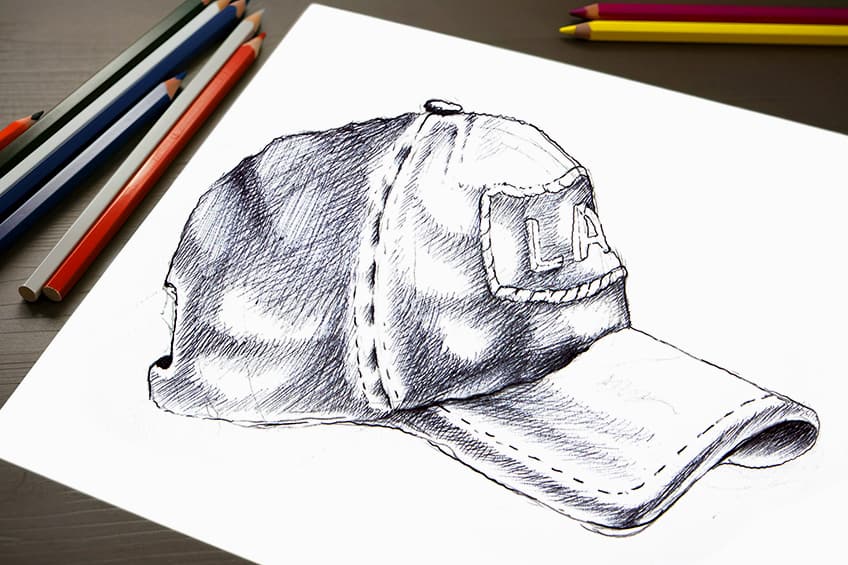
The baseball cap’s texture comes alive through careful shading. Start with the brim, using cross-hatching to suggest the fabric’s weave and the shadow beneath it. Vary pressure on your pencil to create gradients that emulate light reflecting off the surface. For the crown, use lighter strokes to hint at the fabric’s flexibility and the seams’ raised edges. Don’t forget to shade around the button and eyelets to emphasize their three-dimensional presence.
Adding Depth with Shadows and Highlights
Shadows play a pivotal role in creating a sense of volume. Observe how light falls on a real cap and mimic this in your drawing. Darken areas under the brim’s curve, along the sides of the crown where it meets the brim, and beneath any folds or creases. Conversely, leave areas facing the imaginary light source lighter to create highlights. Use your blending tool to smooth transitions between tones for a more natural look.
The Fine Details: Stitching, Logos, and Wear
Details can elevate your drawing from good to great. Carefully draw the stitching along the seams, being mindful of their straightness and consistency. If the cap features a logo or embroidery, replicate it meticulously, considering the textural differences between flat embroidery and the surrounding fabric. To depict a worn or well-loved cap, introduce subtle frays at the edges, slight misalignments in the brim’s curve, or faint stains—these touches add character and realism.

Exploring Different Angles and Perspectives
Challenge yourself by drawing the cap from various angles. A side view emphasizes the cap’s depth and curvature, while a front view showcases the logo or design prominently. Experimenting with perspective not only enhances your drawing skills but also adds dynamism to your artwork collection.
Coloring to Enhance Realism (Optional)
If opting for color, start by laying down base hues with colored pencils or markers. Select shades that match the cap’s actual colors, layering lighter tones first and building up to darker ones. Remember to blend colors seamlessly, especially around transitions like the brim’s underside. Add shadows with complementary colors for depth, and highlights with a white pencil or gel pen to accentuate reflective surfaces.
Finishing Touches and Review
Once your cap drawing is complete, step back and assess your work critically. Erase any remaining guidelines, ensuring they don’t interfere with the final image. Check for symmetry where appropriate and adjust shading for optimal contrast. Lastly, sign your masterpiece—a proud testament to your attention to detail and artistic prowess.

Display and Sharing Your Artwork
After putting in all the hard work and attention to detail, it’s time to showcase your cap drawing. One way to do this is by scanning or taking a high-quality photograph of your artwork. Ensure the lighting is even and avoids glare or shadows that could distort the image. Adjust the brightness and contrast digitally if necessary to make sure the details and colors are accurately represented.
Online Platforms and Social Media
Share your creation on art-focused online platforms and social media. Websites like DeviantArt and Behance are designed for artists to exhibit their work and receive feedback from a community of creatives. Instagram, Pinterest, and Twitter are also excellent for reaching a broader audience. Use relevant hashtags when posting to increase visibility, such as capdrawing, #realisticart, or #pencildrawing, and engage with other artists in the community by commenting on and appreciating their work.
Entering Competitions and Exhibitions
Consider entering your drawing into local or online art competitions. Many have categories specifically for still life or hyper-realistic drawings, providing an opportunity for recognition and exposure. Art exhibitions and galleries might also be interested in showcasing your piece, especially if it aligns with a theme or exhibition they’re planning.

Conclusion: Capturing More Than an Accessory
Drawing a realistic baseball cap is not merely about replicating an object; it’s about capturing the essence of a cultural symbol that transcends boundaries. Through careful observation, precise technique, and a touch of creativity, your illustration can tell a story, evoke emotions, and showcase the beauty in everyday objects. As you refine your skills, remember that practice makes perfect, and each cap you draw brings you closer to mastering the art of realistic apparel illustration.