Introduction to Personalized Baseball Caps
Baseball caps are more than just fashionable accessories; they also serve a practical purpose. They protect us from the sun and provide a sense of style that reflects our personality. One way to make your cap truly unique is through embroidery. Embroidery is an art form that transforms ordinary fabric into a canvas of self-expression. In this guide, “Embroidery 101: How to Personalize Your Baseball Cap,” we will dive into the techniques, materials, and tips needed to create a personalized embroidered baseball cap that suits your style.
Understanding the Basics of Embroidery
What is Embroidery?
Embroidery involves decorating fabric using needle and thread or yarn. It can be simple or elaborate and can involve various stitches like satin stitch, chain stitch, or even appliqué. The beauty of embroidery lies in its versatility; it can be used to create intricate designs or simple lettering. Traditional hand embroidery is a revered art, while machine embroidery has made it accessible to a broader audience.
Why Choose Embroidery for Personalization?
Embroidery offers a level of durability and finesse that other forms of personalization, such as fabric paint or iron-on patches, may lack. While these methods may fade or peel over time, embroidered designs are stitched directly into the fabric, making them more resilient to wear and washing. Moreover, embroidery allows for greater customization, enabling you to incorporate text, logos, and custom designs that showcase your creativity.

Selecting the Right Materials
Choosing the Right Cap
When embarking on your embroidery journey, selecting the right baseball cap is crucial. Look for caps made with sturdy materials such as cotton, denim, or polyester blends. These fabrics provide a suitable surface for embroidery. Keep in mind factors like cap style—structured or unstructured—as well as the color and fit to ensure the cap aligns with your vision.
Selecting Threads and Tools
Choosing the right thread is essential for achieving high-quality results. Polyester embroidery thread is popular due to its durability and resistance to fading. Rayon threads offer a luxurious sheen, while cotton threads give a more rustic appearance. You’ll also require some basic tools: an embroidery hoop to keep your fabric taut, scissors for trimming, and needles in varying sizes for your stitching needs.
Preparing Your Design
Creating Your Design Concept
Before you dive into the actual embroidery, it’s imperative to conceptualize your design. This involves sketching out ideas or utilizing graphic design software to create a digital rendition. Consider elements such as color, size, and complexity. Simple designs often translate better on hats, especially those done by hand. Aim for a design that reflects your personality and can be easily replicated.
Digitizing Your Design
If you intend to use a machine for embroidery, you’ll need to digitize your design. This process transforms your artwork into a format that the embroidery machine can recognize. Software like Adobe Illustrator or CorelDRAW can assist in this process. Alternatively, many companies offer digitizing services tailored for embroidery entrepreneurs. Be prepared for this stage as it can considerably impact the quality of your finished product.
Choosing the Right Stitch Techniques
Understanding Different Stitch Types
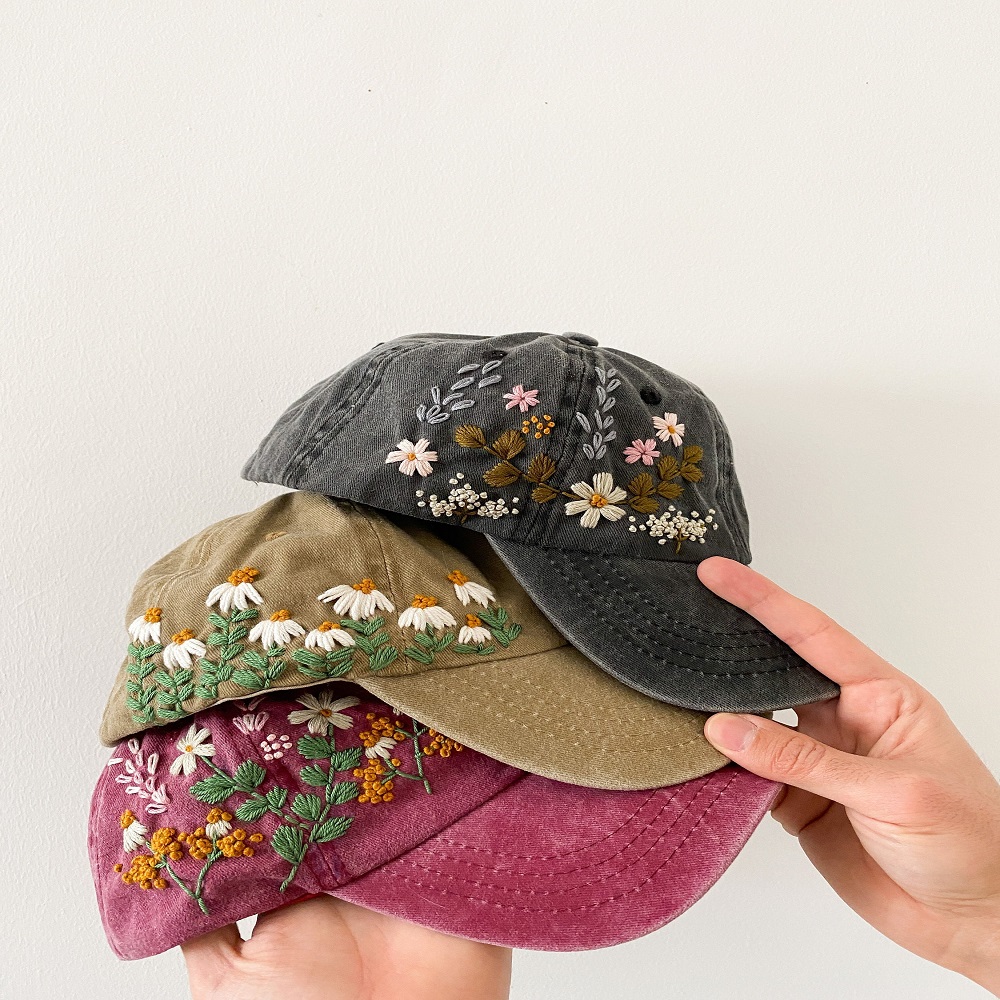
Each stitch brings a different texture and effect to the embroidery. The satin stitch is ideal for filling letters and shapes, giving a clean and professional look. The back stitch is excellent for outlining and can effectively highlight designs. The chain stitch produces a decorative effect, while the French knot adds dimension to small details. Understanding these different stitch types will allow you to select the best techniques for your personalization project.
Combining Stitch Techniques
Feel free to mix and match different stitches for a dynamic look. Combining techniques can create a unique design that stands out. For example, you could use a satin stitch for letters while employing a chain stitch to outline them. This approach not only adds visual interest but can also emphasize key elements of your design. Experimentation is essential, so don’t hesitate to try out different stitches during practice runs.

Preparing Your Cap for Embroidery
Stabilizing Your Fabric
Before you start, stabilize the fabric to ensure a smooth embroidery experience. Stabilizers come in various forms, including tear-away, cut-away, and water-soluble options. Evaluate your cap fabric and the design complexity to determine which stabilizer is best suited. Tear-away stabilizer is easy to remove and works well for straightforward designs, while cut-away is ideal for intricate projects requiring added stability.
Positioning the Design
Careful placement of your design on the cap ensures a professional finish. Use a measuring tape or fabric chalk to mark the center of the cap’s front area. Depending on the shape and fit of your baseball cap, consider the angle for optimal visibility. When using a machine, hoop the fabric securely, taking care to keep the design aligned. A straightforward approach during this prep work can save a lot of time during the actual stitching process.
The Embroidery Process
Hand Embroidery Steps
If you choose to hand embroider, begin by threading your needle and knotting the end. Start from the back of the cap and pull your needle through to the front. For a basic satin stitch, work from side to side, filling in each section with even spacing. Keep your tension consistent to avoid puckering. Take your time, as hand embroidery can be labor-intensive, but the results can be highly rewarding and personalized to your skill level.
Machine Embroidery Steps
For machine embroidery, load your digitized design into the embroidery machine, ensuring the design is correctly positioned in the hoop. Select your thread color and adjust settings according to the design complexity. Start the machine and monitor the process, making sure the tension is correct and the design is stitching out as expected. Once completed, remove the stabilizer and trim any excess threads for a polished finish.
Finishing Touches
Trimming and Cleaning
Post-embroidery, take a moment to carefully trim any loose threads and unravel edges for a cleaner look. You may also want to wash your cap gently with mild soap and water to eliminate any marks from the stabilizer or dust that settled during the embroidery process. Proper cleaning will preserve the quality of the embroidered design and maintain the overall appearance of the cap.
Stretching and Shaping
If the cap has become slightly misshapen during the embroidery process, reshaping is imperative. You can lightly steam the fabric while being cautious not to scorch it. Wear the cap to help mold it back into its original form, or use a cap shaper to ensure it maintains its curve. This attention to detail will enhance its aesthetics and comfort.

Showcasing Your Personalized Cap
Styling Your Cap
Once your embroidery project is complete, think about how to style your personalized baseball cap. It can be worn casually with jeans and a tee or dressed up with a fashionable outfit. Custom caps are an excellent way to showcase your personality and interests. Pair your cap with complementary accessories to elevate your overall look and let it become a statement piece that sparks conversations.
Sharing Your Creation
Don’t forget to share your personalized cap on social media or with friends and family. Showcasing your work can inspire others to try embroidery as a creative outlet. Take quality photos of your creation in different settings and post them on platforms like Instagram or Pinterest. Embrace the community of crafters and engage with others interested in embroidery and fashion.
Maintenance of Your Embroidered Cap
Caring for Your Embroidered Cap
To keep your personalized baseball cap looking fresh, regular maintenance is essential. Avoid tossing it in the washing machine if possible; hand wash it instead using cold water and mild detergent. If needed, spot clean the embroidery to prevent wear. It’s also wise to let the cap air dry rather than using a dryer, which may distort its shape.
Storing Your Cap
Proper storage of your embroidered baseball cap will protect it from dust and deformation. Store it in a cool, dry place away from direct sunlight. Consider using a cap rack or box that helps maintain its shape. Avoid stacking heavy items on top of it, as this could ruin the embroidery and overall appearance.
Conclusion: Embrace Your Creativity
Personalize Your Baseball Cap through embroidery is a rewarding experience that allows you to express your creativity and style. From selecting materials and designing your concept to mastering the stitch techniques and showcasing your final product, each step contributes to the unique appeal of your cap. As you explore the world of embroidery, you’ll unlock endless possibilities for personalization and artistic expression. Embrace the process, challenge yourself, and wear your embroidered baseball cap with pride!
